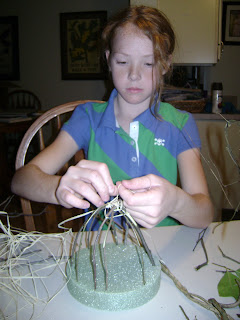
 First, we gathered little tree branches and some raffia (which Mrs. Brittain gave us) to build the frame for our wigwam. We bought a circle of green styrofoam to use as a base to help us build the wigwam (and to be taken off later).
 Next, we put the little tree limbs (we started with branches from a redbud tree) into the styrofoam and bending them over to make arches. We did several of these and then tied them together with raffia.
To strengthen the wigwam, we put in crossbeams and tied those with raffia, too. I decided to dry some redbud leaves that I could maybe use later in some way, so that's what you see on the wigwam floor.

Putting in the crossbeams--which were made of honeysuckle vines--took awhile but it made the wigwam a lot stronger.
We spent a lot of time looking for the right bark. We didn't want to hurt any trees by stripping bark off of them, so we decided it would be best to use sycamore bark since sycamores naturally shed their own bark. But we didn't have any sycamores in our woods. My daddy remembered playing under a big sycamore when he was little, in a neighbor's yard, so we went down there and he had remembered right: we found a lot of good sycamore bark there. We soaked it overnight to make it easier to work with.

Then we added the bark. To keep the bark on we put on a couple more crossbeams and a couple arches, too. This way we could tuck the bark under these to secure them. We only tied the new beams on in a couple places to give us more room to work with.
 And then, before long, it started looking like a real wigwam. We made sure that we had two or three layers of bark, to keep out leaks and make the wigwam cooler in the summer and warmer in the winter.
To make the wigwam look better, first we took off the styrofoam base, then we created a scene for it. We wanted to use all natural products, so we gathered some laurel and holly (because they stay green longer than other kinds of trees or bushes) and some burning bush limbs because they looked like autumn trees. We got some mud out of our creek and spread it around on the foam board and gathered some rocks from the creek, too. And we left room for a creek on our board.

Here you can see me finishing up the wigwam project by putting a little more mud on the foam board. You can also see the trees, the rocks, and the creek (made out of blue tissue paper, the only non-natural product we used, besides the foam board). Below is a closeup of the finished wigwam scene showing the wigwam, the broom (propped against the wigwam), the creek, the laurel bush, some holly, and the mud ground. It was fun to make the wigwam, and I learned a lot about the Native Americans who lived in them.

Here are some links to some websites that really helped me in building my own wigwam:
The best one-http://www.nativetech.org/wigwam/phototour.html


No comments:
Post a Comment